Wednesday, July 29, 2009

Improvising New Stitches

Perhaps I'm a little OCD but I get really annoyed at stitches that only go to one side when I am centered on my seam line. For example #78 & #80 below- the the hearts and stars all face the same direction.


So I use 2 functions of my sewing machine to improvise the stitches that I want. I have a programmable memory on my machine that will store up to 30 stitches so when I want to use the star stitch (#80) I put 1 repeat of the star in the memory and then I use the mirror image function on my machine (it looks like a half circle with a dotted line mirror image half circle facing it)


and I program in 1 repeat of the mirror image of the star. I leaves the rest of the spaces in the memory blank so when I stitch it just alternates between the star and the mirror image of the star and now it looks like this:


When I want to do the hearts I just clear out the memory and repeat the process for that stitch:


I even tried it with my blanket stitch. Here's what it normally looks like (#63):

and after I alternate it in the memory:

and when I'm really bored I just combine several different stitches in the memory- here's 1 heart 1 star and 1 flower:

I just thought I'd share that incase you have these functions on your machine too but haven't tried them- you can have a lot of fun with them!

Tuesday, July 28, 2009

Ready for Quilting

I made the last cut and got my blocks basted so they are now headed towards the pile of blocks that are ready to be quilted.

What other projects are in that pile? I was wondering that myself and after a quick search it looks as if there are only 2 other projects in that pile now:

the one I started last fall with hand dyed fabrics


and one I started many years ago as an experiment. I had some metallic fabric that I wanted to try out and figured it would be the perfect project to try metallic threads on too.

It's been a learning experience. Mostly I learned I will never use metallic threads for decorative stitching again.


I think I'm going to make a goal of finishing the metallic one in time to put it in this year's CASA auction in November.

P.S. The blue & yellow one I was wondering what I should do with is headed to my dad's cousin who was recently in a terrible car accident.

Sunday, July 26, 2009

Works in Progress

I got bored finishing projects I had already started and decided to start a couple of new quilts. The first one is another project using charm squares but this time I'm only doing one cut per charm and I'm putting nine charms together to form a block instead of four. I'm leaving the center charm in each block a solid piece of fabric and I'm going to use that same fabric for the sashing later.
Here's a pic of the charms before I cut them:


after the 1 cut:


Here they are pieced back together, now I just need to sew the 9 charms together:


The other project I started is the same cuts as my mom's "Warm chocolate Wrap" from our book but I'm making it twin sized and using some blue & yellow plaids that I've had for a few years. Here's a pic of my blocks with 5 cuts in them- I still have one more cut to do:


I'll try to make some progress and post again in a couple of days.

Thursday, July 2, 2009

Easy to Go Crazy

I finished another one! I'm feeling very productive all the sudden! This one is the same as one of the quilts in our book only slightly different fabrics. The one in the book was made by my mother so I wanted to make one myself. There are seven quilts in the book that my mom made using cuts I haven't tried and I'd like to try them all eventually.
I'm having a bit of a dilemma about what to do with this quilt so I thought I'd put my options out there to see what you guys think. Option #1: Give it to an acquaintance who just had a baby (I don't know this person very well, so I'm worried it might be weird if I give her a quilt) Option #2: Put it in the charity quilt auction in November (which will make it a tax write off) #3: Save it for Christmas and give it to an as-of-yet-undecided person on my shopping list or #4: Try to sell it on Etsy. Thoughts?

close up:

back:

Sunday, June 28, 2009

Weekend Fun

We've had some beautiful weather this weekend and we've been out enjoying it and I thought I'd share some of the photos:
The beach at Kincaid


Face painting at the Saturday market

Audrey was very proud of her Frosty

More fun at the Saturday market- Audrey's turn to paint

Thursday, June 25, 2009

Shortcake

I just got my camera back from the repair shop! I'm so happy to have it home and it arrived right in time to show you the quilt I just finished. It's from my mom's Shortcake pattern which only takes 1 layer cake and 1 yard of fabric for the sashing & binding. It's fast and easy and I think it will be the perfect gift for a little girl I know that is turning 2 in August.
front:

close up:

back:

Friday, May 29, 2009

Pyramids

This is from a class I took at Seams Like Home about 2 years ago I think. So it's really a newbie to my UFO pile, but quilting a lapsize quilt seemed really appealing after that flannel beast. This pattern is usually called either 1,000 Pyramids or 10,000 Pyramids, I forget which, and has a ton of bias to deal with. It didn't stretch too bad although next time I will use a heavier hand with the starch before I cut my pieces out. And yes, you heard me right, I liked it so much I think I will make another one! Not right away- I'm not ready to give up on my battle against the UFO's- but I am starting to plan.

You can sort of see my quilting lines if you look really closely. I did a zig zag pattern following the same angle of the triangles (it reminds me of Charlie Brown's shirt).

And for the back I found a really cool varigated striped batik. All the fabrics on the front are batik too.

I've decided to give this one to a family member with a birthday in June- I hope she likes blue!

Flannel Finale!

It's finally done- and weighs in at just over 4 pounds! As you can see what started out as a full size quilt covers the top of my king size mattress.


I did swirls in the inner border and at my mom suggestion I went around the moons & stars in the outer border in a blue thread that just disappears. It's certainly not perfect but it's done and I'm happy!


You can sort of see the star in the center and the straight lines going through the bow ties.

On to the next UFO!

Tuesday, April 21, 2009

Home Imporvements

I painted one wall in my house blue- it's about the same color as that painter's masking tape. I have been wanting to paint for a while but I couldn't decide what color, but just over a week ago I decided blue is what I want and just went for it- stayed up all night and into the wee morning hours (5am to be exact) just to get it done in one night. I'm quite happy with it- it makes me smile every time I look at it.

That project went very well so I decided to tackle another project I have been dreaming of for a while: an awning. My back deck has a roof over it that has exposed beams showing. These beams turn into a breeding ground for spiders in the summer so I usually end up avoiding spending time on the deck. Here's what it looked like before:


So I decided to order some outdoor fabric from JoAnn's and staple it to the beams. I loved the idea of a black & white stripe- it it reminds me of a restaurant awning.

I also love looking out the window of my blue wall at the striped awning.

Next up on my list of things to tackle: sand down my kitchen cabinets and paint them white and spray all the hardware silver (currently I have medium to darkish wood cabinets and brass hardware).

P.S. Again I apologize about the blurry photos. I am trying to track down my old digital camera until I get this one fixed but apparently I put it somewhere REALLY safe in one of my cleaning sprees.

Saturday, April 18, 2009

Sewing Studio Update

Okay, I did a little straightening up. But I wanted you to see what it really looks like when I'm sewing in there- it never stays this clean. The best part of a clean sewing room is messing it up again right?


I apologize for the blurry photos- I dropped my camera the other day and now I can't get it to focus =(

Friday, April 10, 2009

Studio Tour

Sooooo... Here is a guided tour of the mess that I call my sewing room:

This is the view when you open the door

That cabinet you see with all the junk on it? That's my cutting table. And inside the cabinet?:


Piles of fabric and a serger that I've only used once or twice (the serger is in the red bag). And just incase you missed it here's a close up of the mess on top of the cutting table:


On the far side of the cutting table under the window is another shelf filled with fabric and a rack for my pressing pad and cutting mats in the corner:


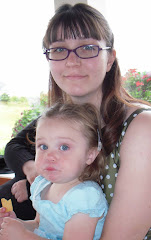
Here is my sewing table- you can see my little helper pushing various buttons on my machine for me. When sitting in front of my machine my back is touching the edge of the cutting table:

Above my sewing table is a peg board that holds some of my threads and rulers:

To the right of my sewing table is my bookshelf:


The bottom 2 shelves are filled with quilting books, the middle shelf is patterns (I'm not a big pattern buyer) and some fabric and the top two shelves are all fabric. To the left of the shelf is a roll of organic batting that I bought but haven't used yet, so it's still in the box, and on top of the bookshelf (not in the picture) is a case of stuffing (for a puff quilt that I'm going to make someday in the future). The right side of the bookshelf buts up to the closet:


I took the doors off the closet for easier access. On the left is my Bernina ironing board with a built in vacuum so your fabric stays put (I almost never use this) and behind that is a cabinet with 2 shelves. The cabinet has about 6 yards of terry cloth that was for a robe I never made and the drawers hold various fusible webs that are probably dried out and brittle by now. The shelf/drawer system on the right is mostly filled with unfinished projects and the bottom area (mostly out of the picture) is holding 10 bolts of linen that I purchased to make quilts yet but currently are still in their plastic wrap.
And last but not least is a cabinet in Audrey's room that I never emptied out when we switched rooms (I used to have a much larger sewing room but for some reason that I'm finding hard to remember right now I decided she should have the larger room, so we switched)

This cabinet is mostly filled with fatquarter packs that are still wrapped up exactly as I purchased them. It makes me happy to see all those pretty little bundles though. I hope you enjoyed peeking in my sewing room- I can't wait to see everyone elses!